How to add icons on both sides of the logo?
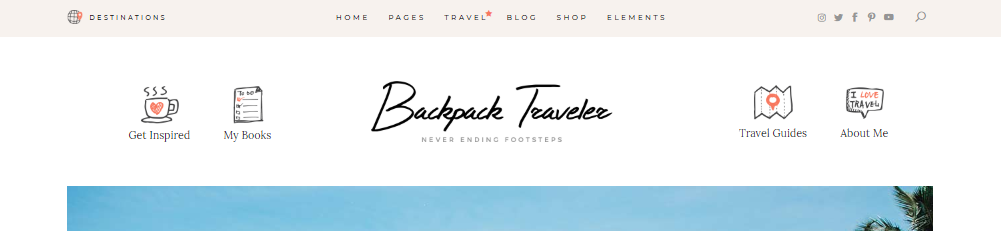
To create this type of header, please do the following:
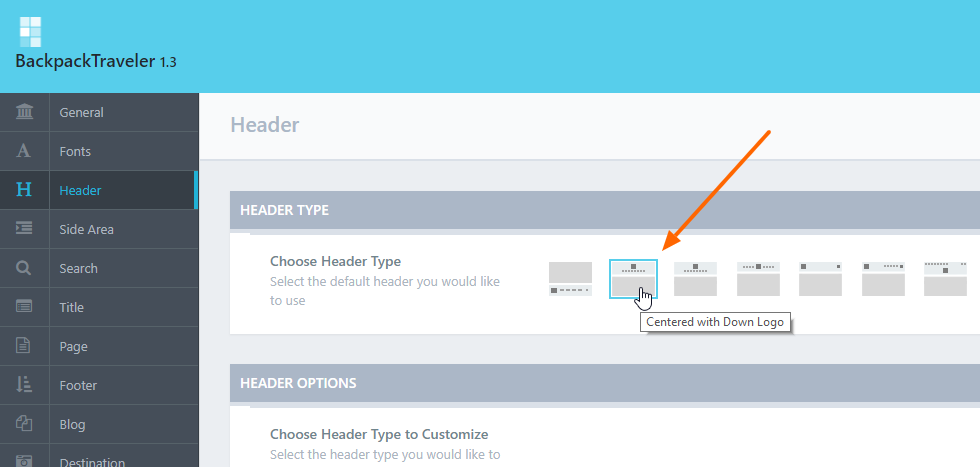
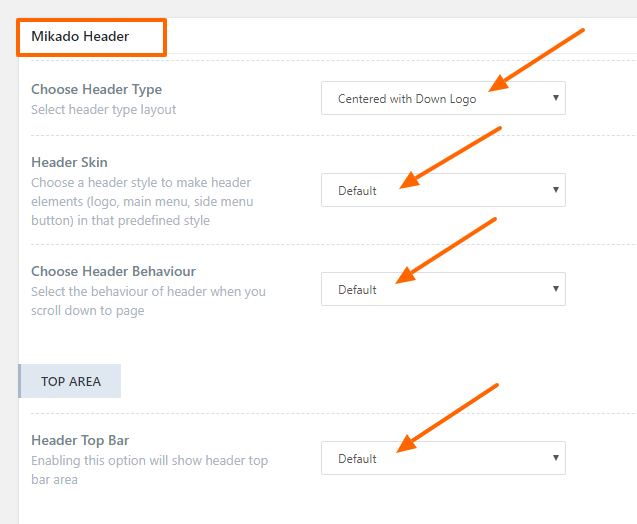
- Navigate to Backpack Traveler Options > Header > Header Type and choose the Centered with Down Logo header.
- To add content to the sides of the logo, navigate to Appearance > Widgets and add your widgets to the Centered with Logo Down Header Left and Centered with Logo Down Header Right widget areas.

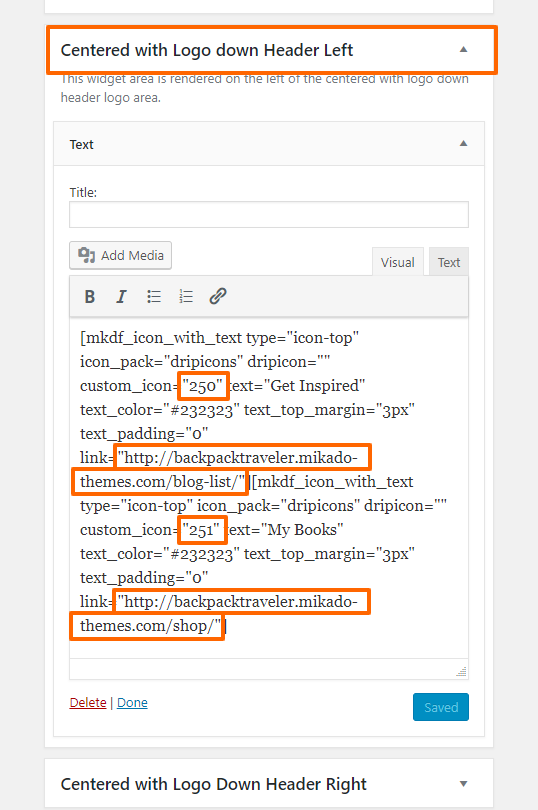
If you want to have the exact widgets that we used on our demo site, then add the following code to the Centered with Logo Down Header Left widgetarea via the Text block or Custom HTML widget:
[mkdf_icon_with_text type="icon-top" icon_pack="dripicons" dripicon="" custom_icon="250" text="Get Inspired" text_color="#232323" text_top_margin="3px" text_padding="0" link="http://backpacktraveler.mikado-themes.com/blog-list/"][mkdf_icon_with_text type="icon-top" icon_pack="dripicons" dripicon="" custom_icon="251" text="My Books" text_color="#232323" text_top_margin="3px" text_padding="0" link="http://backpacktraveler.mikado-themes.com/shop/"]
You just need to replace the image IDs with the corresponding image IDs from your Media Library. If you imported demo content, these icon images should have imported and you can find them in the Media Library. See how to find the image ID. You can also change the links as you wish.
Next, add the following code to the Centered with Logo Down Header Right widgetarea:
[mkdf_icon_with_text type="icon-top" icon_pack="dripicons" dripicon="" custom_icon="252" text="Travel Guides" text_color="#232323" text_top_margin="3px" text_padding="0" link="http://backpacktraveler.mikado-themes.com/blog-standard-right-sidebar/"][mkdf_icon_with_text type="icon-top" icon_pack="dripicons" dripicon="" title_tag="" custom_icon="253" text="About Me" text_color="#232323" text_top_margin="3px" text_padding="0" link="http://backpacktraveler.mikado-themes.com/about/"]
Similarly as above, you should replace the image IDs and the links within this code.
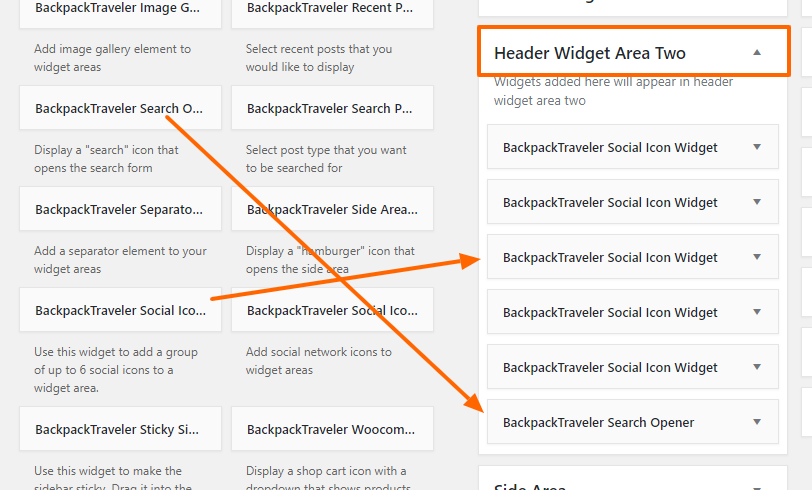
- To add content next to the top menu, navigate to Appearance > Widgets and add your widgets to the Header Widget Area One and Header Widget Area Two widget areas.

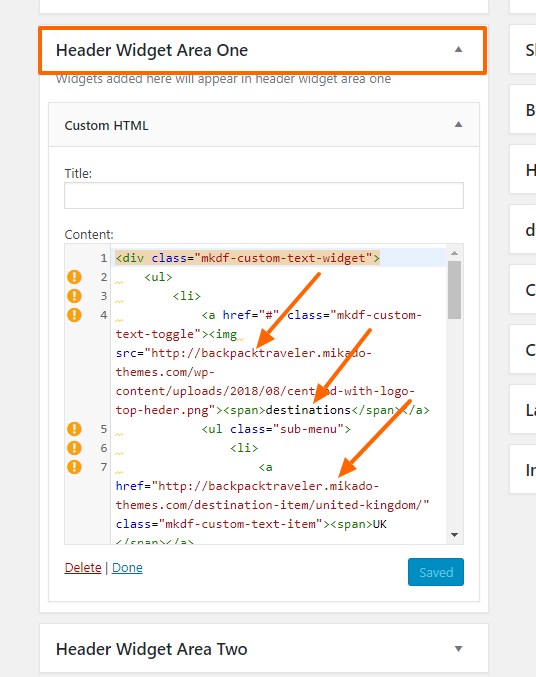
If you want to add the exact widgets that we used on our demo site, then add the following code to the Header Widget Area One:
<div class="mkdf-custom-text-widget">
    <ul>
        <li>
            <a href="#" class="mkdf-custom-text-toggle"><img src="http://backpacktraveler.mikado-themes.com/wp-content/uploads/2018/08/centred-with-logo-top-heder.png"><span>destinations</span></a>
            <ul class="sub-menu">
                <li>
                    <a href="http://backpacktraveler.mikado-themes.com/destination-item/united-kingdom/" class="mkdf-custom-text-item"><span>UK </span></a>
                </li>
                <li>
                    <a href="http://backpacktraveler.mikado-themes.com/destination-item/australia/" class="mkdf-custom-text-item"><span>Australia</span></a>
                </li>
                <li>
                    <a href="http://backpacktraveler.mikado-themes.com/destination-item/italy/" class="mkdf-custom-text-item"><span>Italy</span></a>
                </li>

                <li>
                    <a href="http://backpacktraveler.mikado-themes.com/destination-item/spain/" class="mkdf-custom-text-item"><span>Spain</span></a>
                </li>
							   <li>
                    <a href="http://backpacktraveler.mikado-themes.com/destination-item/serbia/" class="mkdf-custom-text-item"><span>Serbia</span></a>
                </li>
   <li>
                    <a href="http://backpacktraveler.mikado-themes.com/destination-item/brazil/" class="mkdf-custom-text-item"><span>Brazil</span></a>
                </li>
							   <li>
                    <a href="http://backpacktraveler.mikado-themes.com/destination-item/peru/" class="mkdf-custom-text-item"><span>Peru</span></a>
                </li>
   <li>
                    <a href="http://backpacktraveler.mikado-themes.com/destination-item/india/" class="mkdf-custom-text-item"><span>India</span></a>
                </li>
            </ul>
        </li>

    </ul>
</div>
You can replace the image link with your own link. This is the icon of the globe that appears next to “Destinations” in the header. The names in the menu and their corresponding links can also be changed within this code.
In the Header Widget Area Two, we added multiple instances of the Social Icon widget, along with the Search Opener widget.
What if the header looks different than the one on the demo site?
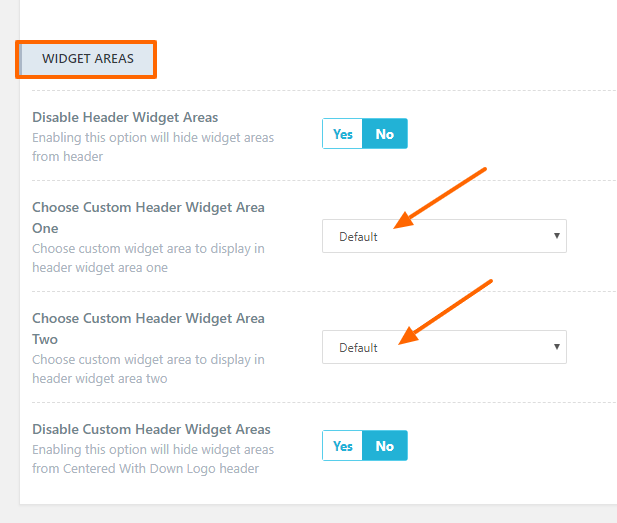
Check your page settings under the section Mikado Header and make sure that you’ve set the Centered with Down Logo. Other values should be set to default.
Under that same section, Mikado Header, make sure that the settings under Widgets are set to default.